

Measuring For a New Toilet
How can one use a tape measure to measure and install a new toilet?
Learning how to remove and install a new toilet begins with accurately sizing the fixture. The ideal dimensions for a toilet depend on your bathroom’s layout and the location of the floor drain. Toilets are typically categorized by rough-in size—a critical measurement determined by the distance from the back wall to the center of the closet bolts securing the existing toilet to the floor. Always measure from the wall (not the baseboard) for precision. While a 12-inch rough-in is most common, 8-inch or 14-inch configurations may also be encountered.
Next, assess the proximity of floor-mounted water supply lines. Some toilets feature wider bases that could interfere with supply lines, so measure the distance from the bowl to adjacent sidewalls to ensure proper fit. If your toilet is positioned beneath shelves or a cabinet, also measure the tank height (from the floor to the top of the tank lid) to avoid clearance issues.
Choosing the Toilet Bowl Shape
Toilet bowls typically come in two shapes:
- Elongated: Prioritizes comfort but requires more space.
- Round: Ideal for compact bathrooms but offers less seating area.
The bowl shape dictates the toilet seat size. While most seats are standard, verify measurements during shopping to account for manufacturer variations. Here’s how to measure for a toilet seat:
- Front-to-Back Length: Remove the seat and measure from the center of the bolt holes to the front edge of the bowl (16.5 inches for round bowls; 18.5 inches for elongated).
- Bolt Hole Spacing: Measure the distance between the center points of the bolt holes (typically 5.5 inches).
- Bowl Width: Measure the widest outer edge of the bowl (14–14.5 inches).
Removing the Old Toilet
Before installing a new toilet, safely remove the old fixture. Follow these steps:
Step 1: Shut Off and Drain Water
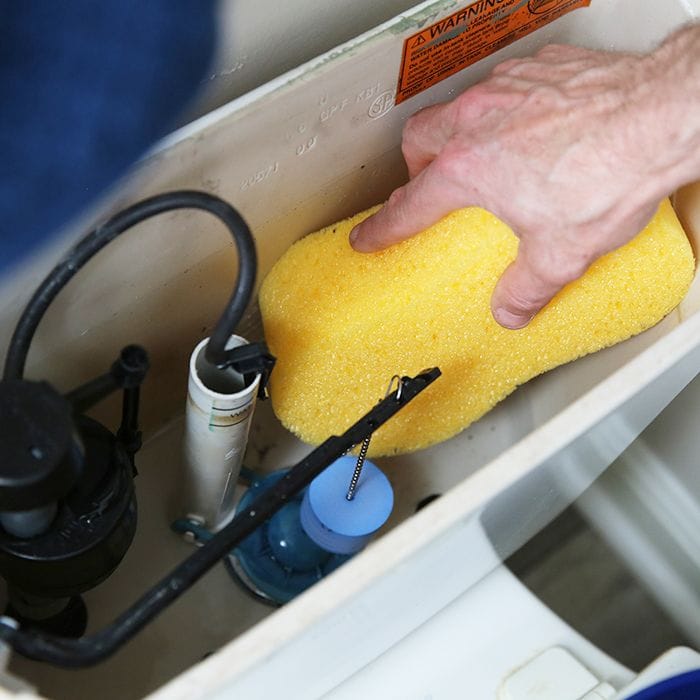
- Turn off the water supply line and flush to empty the tank.
- Use a sponge to remove residual water from the tank and bowl.
Step 2: Disconnect Water Lines
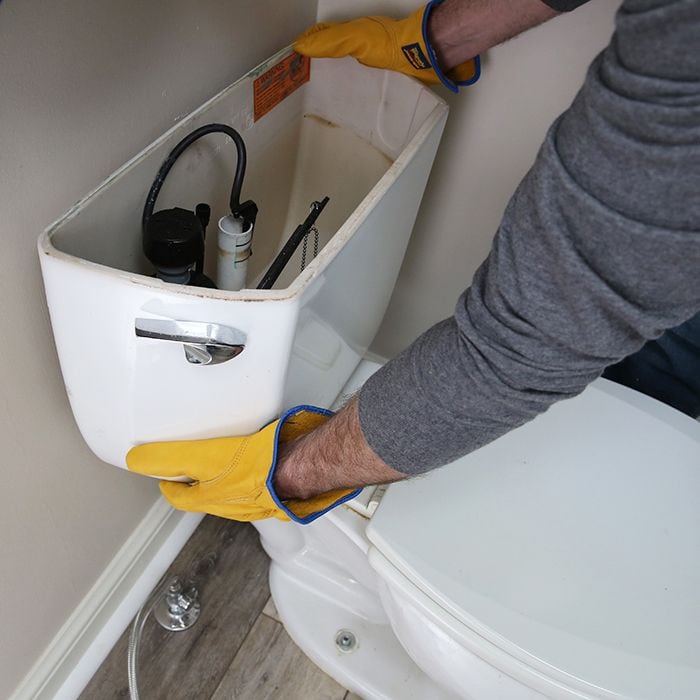
- Detach the water supply line from the tank and place a bucket beneath to catch remaining water.
- Unscrew the nuts at the base of the tank, then carefully lift the tank off the bowl (wear gloves to avoid cracks).
Step 3: Uninstall the Bowl
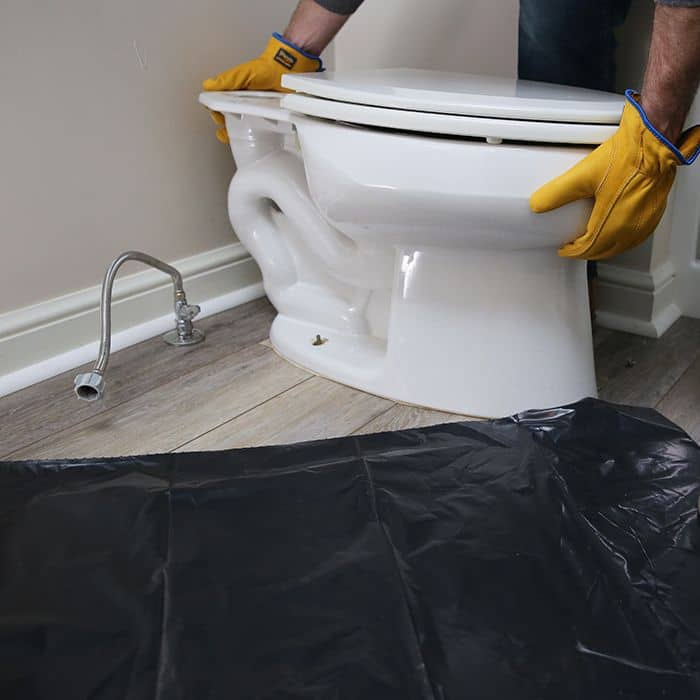
- Apply a water solidifier or sponge to absorb excess water in the bowl.
- Remove toilet bolt caps, then loosen and remove the nuts securing the bowl to the floor.
- Lift the bowl and set it aside on a garbage bag (toilets are heavy; consider removing the tank first for easier handling).
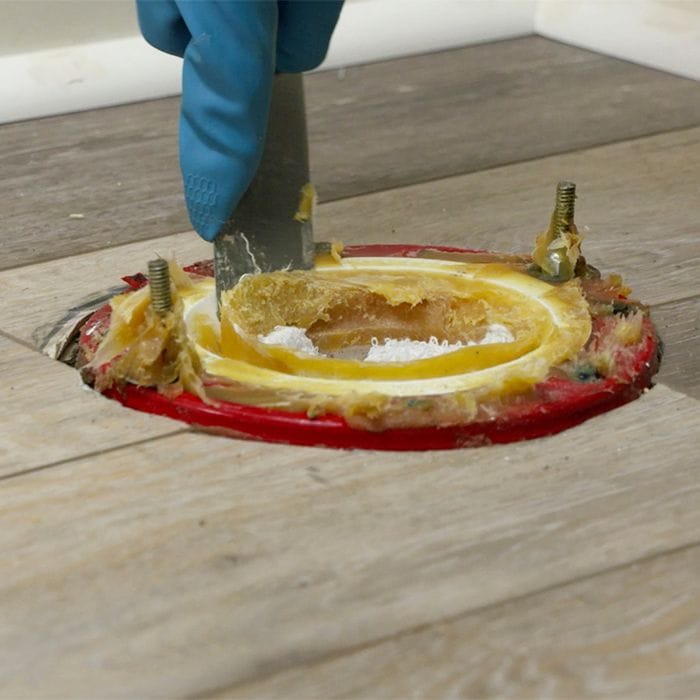
Step 4: Replace the Wax Ring
- Wax rings are single-use; remove the old ring with a plastic putty knife or shim (dispose afterward).
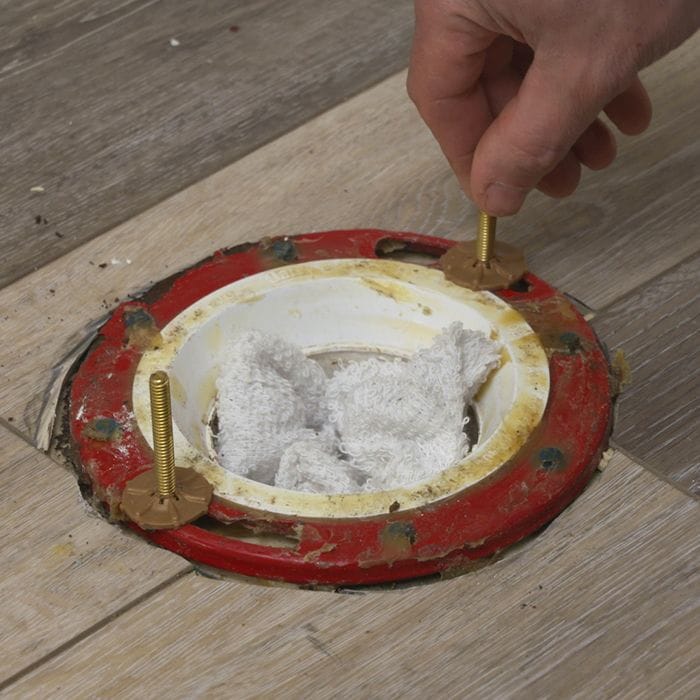
- Stuff a rag in the drain to block sewer gases and debris.
- Clean excess wax from the flange (the top of the drainpipe).
Pro Tip: For guidance on replacing a wax ring, refer to our guide How to Replace a Toilet Wax Ring.
Step 5: Inspect and Repair the Flange
- Remove old closet bolts and assess the flange for damage.
- Use repair kits or replacement flanges to fix issues. Ensure the flange sits slightly above the finished floor; if new flooring is planned, use taller wax rings or flange spacers (secure spacers with silicone and screws).

Installing a New Toilet
Follow these steps to install your new toilet with precision:
Step 1: Install New Closet Bolts
- Slide new closet bolts into the flange slots and secure them with washers or nuts.
- Tighten gently to align the toilet during installation.
Pro Tip: If the toilet feels unstable, use shims for support. Place the bowl (without the wax ring), adjust shims, tape them in place, then remove the bowl to install the wax ring. Trim excess shims after installation.
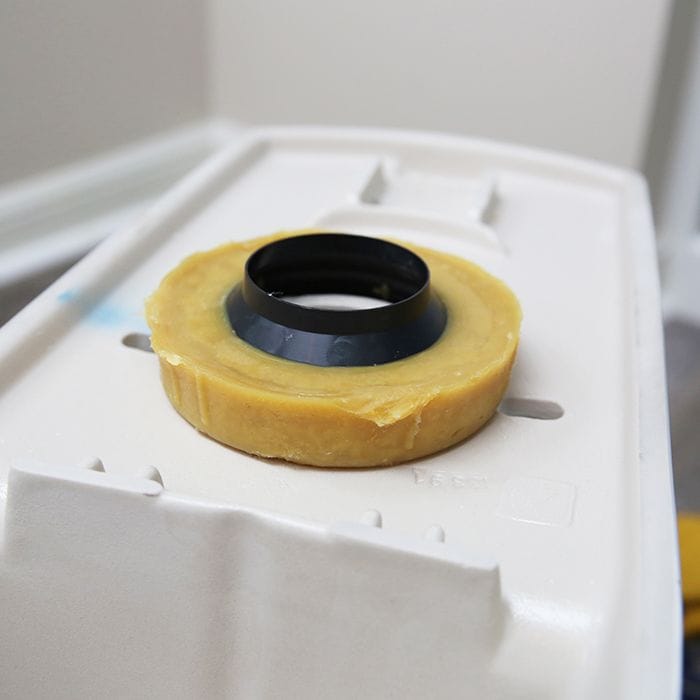
Step 2: Prepare and Install the Wax Ring
- Soften the wax ring by running it under warm water.
- Option 1: Press the ring onto the outlet beneath the upside-down toilet bowl.
- Option 2: Place the ring directly on the floor flange.
- Note: Most toilets include a wax ring, but purchase a backup (or wax-free foam/rubber ring) for added security.
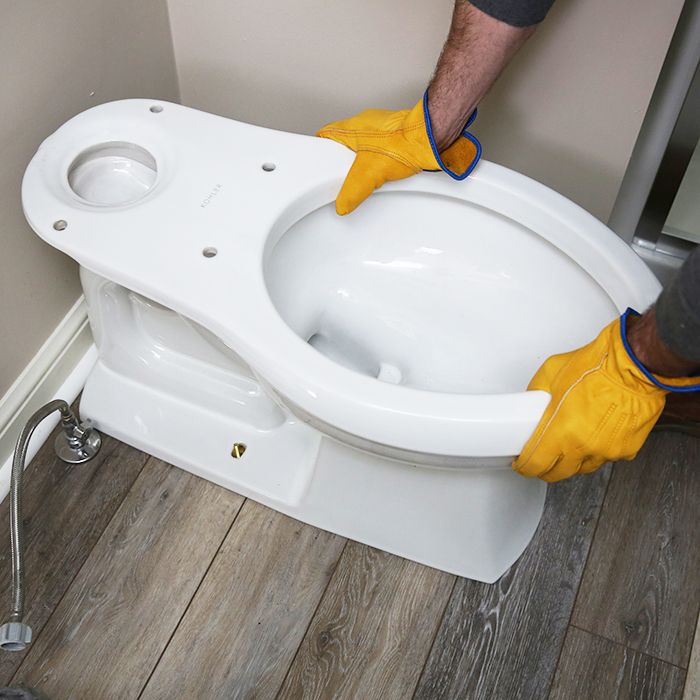
Step 3: Set the Toilet Bowl
- Remove the rag from the drain and carefully lower the bowl over the closet bolts.
- Avoid tilting—place it straight down onto the flange to preserve the wax ring seal.
- Press firmly to ensure the bowl is square against the wall.
Step 4: Secure the Bowl to the Floor
- Attach cap bases, washers, and nuts to the closet bolts (ensure caps face upward).
- Tighten nuts alternately to distribute pressure evenly—avoid over-tightening to prevent cracking.
- Cut excess bolt length with a hacksaw and snap on decorative caps.
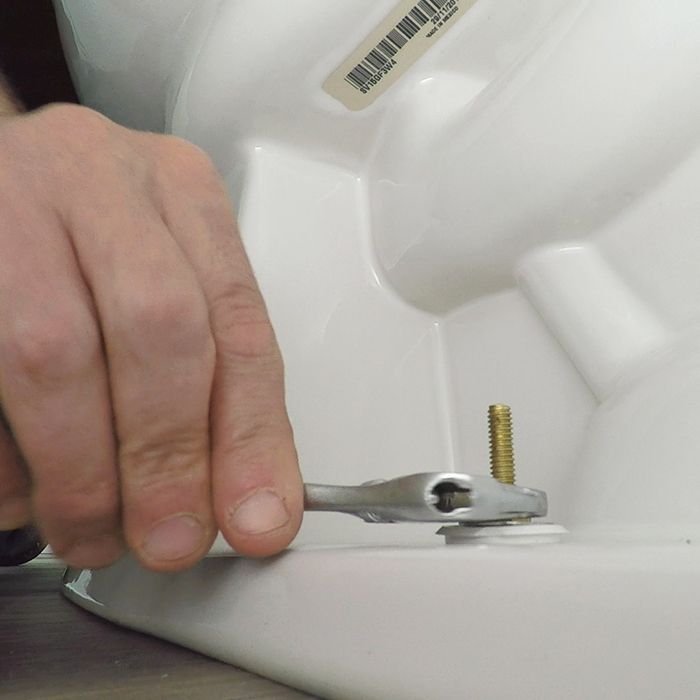
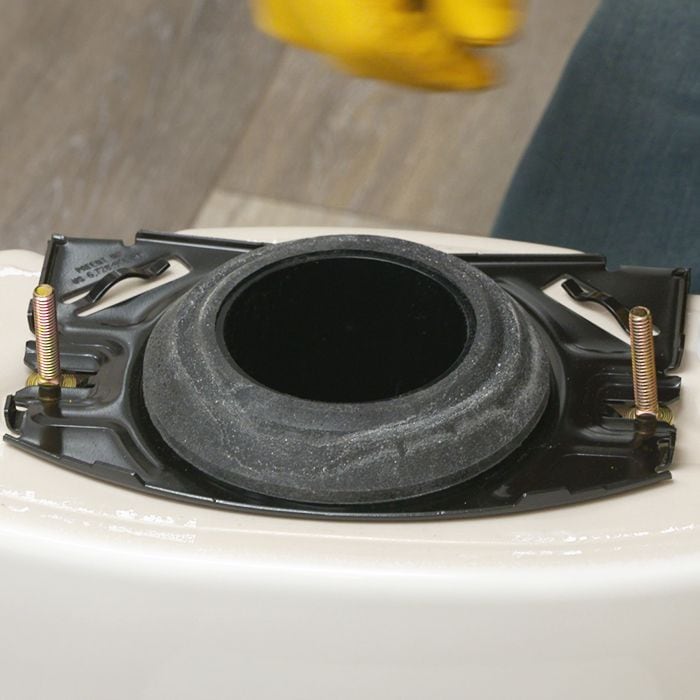
Step 5: Assemble and Attach the Tank
- Most tanks come pre-installed with a valve assembly. Flip the tank to install bolts and a rubber gasket at the base.
- Set the tank on the bowl, hand-tighten nuts, then use a wrench to snug them (alternate sides and avoid over-tightening).
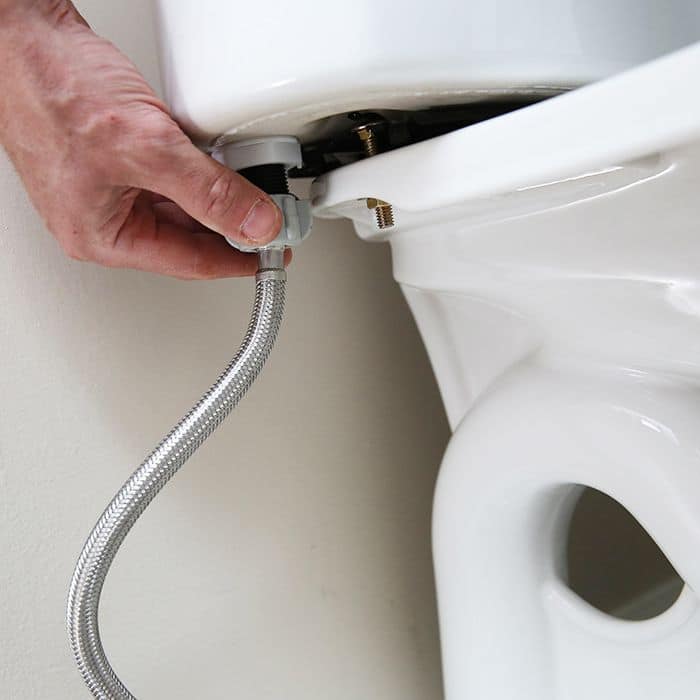
Step 6: Test for Leaks
- Reconnect the water supply and slowly turn on the valve.
- Check for leaks around the supply line, tank base, and bowl perimeter.
- If leaking persists at the base, the wax ring may be compromised—reinstall with a new ring, ensuring even placement.
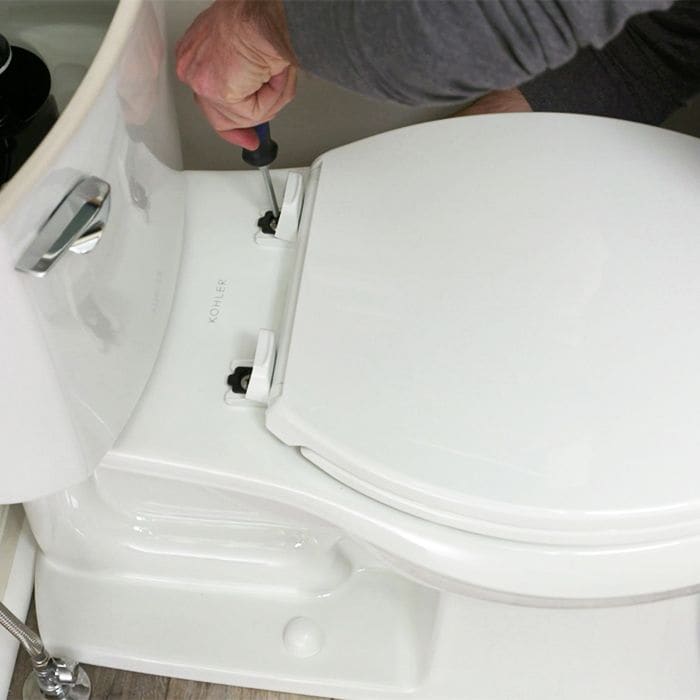
Step 7: Install the Toilet Seat
- Use a screwdriver to attach the seat, then place the tank lid.
Need Professional Help?
For hassle-free installation, YIDA offers expert toilet installation services. Skip the DIY process and trust our team to ensure a secure, leak-free fit.
Key Takeaways
- Measure Twice, Buy Once: Accurate rough-in, water line, and clearance measurements are critical.
- Wax Ring Best Practice: Always replace the wax ring and handle it gently to avoid damage.
- Tighten with Care: Even pressure prevents cracks, and testing for leaks ensures a successful install.
With these steps, you’ll achieve a professional-grade toilet replacement—whether you DIY or call in YIDA’s experts!